


Imagine having the freedom to create your own smartphone from scratch, tailoring every aspect to your personal preferences and needs. The project of building a smartphone using a Raspberry Pi has garnered significant attention, offering a unique blend of innovation and customization.
By taking control of your device’s hardware and software, you can enhance your privacy and security, ensuring that your personal data remains protected. This level of control is not typically available with commercially available smartphones.
Building your own device can be a rewarding experience, allowing you to learn about the intricacies of smartphone technology while creating something truly unique.
Key Takeaways
- Create a customized smartphone tailored to your needs.
- Enhance your privacy and security.
- Learn about smartphone technology through hands-on experience.
- Enjoy the satisfaction of building something unique.
- Have complete control over your device’s hardware and software.
Understanding the Raspberry Pi Phone Concept
Raspberry Pi phones represent a fascinating convergence of DIY culture and modern telecommunications. This concept has evolved significantly over the years, driven by innovative projects and the growing community of makers and tech enthusiasts.
The Evolution of PiPhone Projects
The journey of PiPhone projects has been marked by significant milestones, with pioneers creating functional smartphones using Raspberry Pi boards. Projects like the OURPhone have demonstrated the potential of Raspberry Pi in creating fully functional smartphones with advanced features such as 4G LTE support and GPS.
« The OURPhone project showcases the possibilities of using Raspberry Pi for creating smartphones, highlighting the potential for customizability and control over privacy. »
Advantages of Building Your Own Smartphone
Building your own smartphone using Raspberry Pi offers several advantages. It allows for customizability, enabling users to tailor their device to specific needs. Additionally, it promotes repairability, reducing electronic waste and extending the device’s lifespan. Users also gain greater control over their privacy, as they can choose the software and features that come with their device.
| Advantages | Description |
|---|---|
| Customizability | Tailor your device to specific needs and preferences. |
| Repairability | Easily repair and upgrade components, reducing electronic waste. |
| Privacy Control | Choose the software and features that enhance your privacy. |
Realistic Expectations and Limitations
While building a Raspberry Pi phone is an exciting project, it’s essential to have realistic expectations. The device may not match the performance of commercial smartphones, and certain features might be limited by the hardware and software used. Understanding these limitations is crucial for a successful DIY smartphone project.
In conclusion, understanding the Raspberry Pi phone concept involves appreciating its evolution, advantages, and limitations. As technology continues to advance, the potential for creating sophisticated DIY smartphones grows, offering makers and enthusiasts new possibilities for innovation.
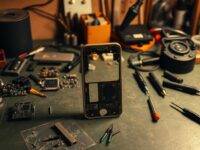
Essential Components for Your DIY Smartphone
The journey to building your own smartphone starts with identifying the right components for your Raspberry Pi project. Creating a functional DIY smartphone requires a thorough understanding of the essential hardware components.
Core Hardware Requirements
The core hardware components are the backbone of your Raspberry Pi phone. These include the Raspberry Pi model, touchscreen display, GSM/LTE module, and battery solution.
Raspberry Pi Model Comparison
When choosing a Raspberry Pi model, consider factors like processing power, memory, and connectivity options. The Raspberry Pi 4 Model B is currently the most advanced version, offering improved performance and features.
Touchscreen Display Options
Selecting the right touchscreen display involves considering size, resolution, and compatibility with your Raspberry Pi model. Popular options include official Raspberry Pi displays and third-party touchscreens.
GSM/LTE Modules Compatible with Raspberry Pi
For cellular connectivity, you’ll need a compatible GSM/LTE module. Modules like the Sixfab LTE Cat M1/Narrowband IoT Shield are popular choices.
Battery Solutions and Power Management
A suitable battery solution is crucial for a portable smartphone. Lithium-ion batteries with appropriate power management circuits are recommended.
Additional Components for Enhanced Functionality
To enhance your DIY smartphone’s functionality, consider adding components like microphones, speakers, and camera modules.
Microphones and Speakers
For audio input and output, you’ll need compatible microphones and speakers. USB microphones and speakers or those connected via GPIO pins can be used.
Camera Modules
Camera modules like the official Raspberry Pi Camera v2 offer high-quality imaging capabilities. Ensure the module is compatible with your Raspberry Pi model.
Tools and Budget Planning
Planning your budget and gathering the necessary tools are crucial steps. Estimate costs for components and consider tools like soldering irons, jumper wires, and breadboards.
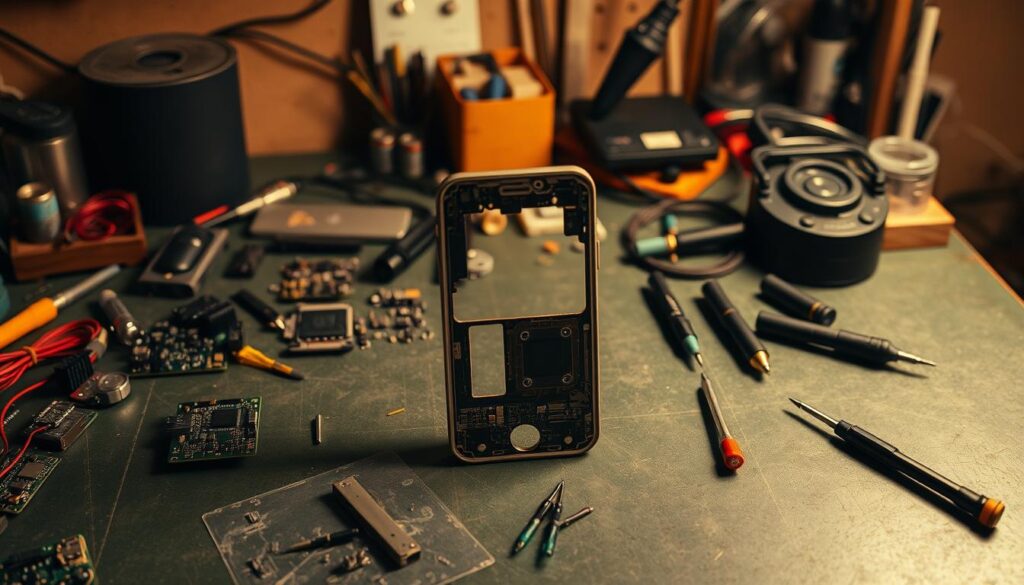
Step-by-Step Raspberry Pi Phone Assembly Guide
With the right components and a step-by-step guide, you can successfully assemble your Raspberry Pi phone. This comprehensive guide will walk you through the process, ensuring that you can build a functional homemade mobile phone that meets your needs.
Preparing Your Workspace and Components
Before starting the assembly, it’s crucial to prepare your workspace and components. Ensure you have a clean, well-lit area to work in, and organize all the necessary components within easy reach. This includes your Raspberry Pi board, display, touchscreen interface, cellular module, power system, and casing materials. Proper preparation will streamline the assembly process and reduce the risk of component damage.
Connecting the Display and Touchscreen Interface
Carefully connect the display to your Raspberry Pi, ensuring that all cables are securely attached. If your display requires additional drivers or configuration, follow the manufacturer’s instructions. Next, integrate the touchscreen interface, calibrating it to work seamlessly with your display. This step is critical for a responsive user experience.

Installing and Configuring the Cellular Module
The cellular module is a vital component for making calls and sending texts. Install the module according to the manufacturer’s instructions, typically involving connecting it to the Raspberry Pi’s GPIO pins. Configure the module using the provided software tools, ensuring it’s recognized by your piphone tutorial operating system.
Power System Integration
Integrating a reliable power system is essential for a functional smartphone. Choose a suitable battery that fits your project’s power requirements and connect it to a power management module if necessary. Ensure that the power system is properly connected to the Raspberry Pi and other components, providing stable power without overloading the system.
Designing and Creating a Functional Case
The final step is designing and creating a case that houses all your components securely. Consider the size, material, and durability when designing your case. You can use 3D printing or other crafting techniques to create a case that not only protects your build smartphone project but also makes it portable and user-friendly.
By following these steps, you’ll be able to successfully assemble your Raspberry Pi phone, creating a unique and functional homemade mobile phone. This project not only showcases your technical skills but also provides a rewarding DIY experience.
Software Configuration and Optimization
The software configuration is where your Raspberry Pi phone transforms from a collection of components into a functional smartphone. This stage is crucial for ensuring that your device operates smoothly and efficiently.
Operating System Installation and Setup
Installing a suitable operating system is the first step in configuring your DIY smartphone. Popular choices include Lineage OS and Raspberry Pi OS. Lineage OS offers a more traditional smartphone experience, while Raspberry Pi OS is optimized for the Pi hardware. The installation process involves flashing the OS image onto the microSD card using tools like Etcher or Rufus.
Configuring Cellular Connectivity
To enable cellular connectivity, you’ll need to configure the GSM/LTE module. This involves setting up the module’s drivers and configuring the network settings. Ensure that your SIM card is properly inserted and recognized by the system. You may need to edit configuration files to specify the APN settings for your carrier.

Essential Applications for Smartphone Functionality
A functional smartphone requires more than just an operating system. You’ll need to install essential applications such as a dialer, messaging app, and a web browser. The Google Play Store or F-Droid can be used to download these applications, depending on your chosen OS.
Performance Tweaks and Battery Optimization
Optimizing your Raspberry Pi phone’s performance and battery life involves tweaking system settings and managing resource-intensive applications. Adjusting the CPU governor, disabling unnecessary services, and using power-saving features can significantly improve battery life.
Troubleshooting Common PiPhone Issues
Common issues with your DIY smartphone may include connectivity problems, poor battery life, or application crashes. Troubleshooting these issues involves checking the configuration files, updating software, and optimizing system resources. Online forums and community support can be invaluable resources for resolving these issues.
Conclusion: Taking Your DIY Smartphone to the Next Level
Now that you’ve successfully created your homemade mobile phone using a Raspberry Pi, the possibilities for further development and customization are endless. By following this piphone tutorial, you’ve not only built a functional diy phone but also gained a deeper understanding of the technology behind it.
To take your DIY smartphone to the next level, consider exploring custom ROMs, additional hardware modifications, or innovative uses for your device. Experiment with different configurations, share your experiences, and learn from others in the community to continually improve and personalize your diy phone.
As you continue to experiment and push the boundaries of what’s possible with your homemade mobile phone, you’ll not only enhance your device but also contribute to the growing community of DIY enthusiasts and makers. The journey doesn’t end here; it’s just the beginning of a new chapter in the world of DIY smartphones.